How to weave in yarn ends
Jump To:
What does weaving in the ends mean?
In crochet, weaving in the yarn ends involves burying all of the yarn tails that remain when your product is finished. Weaving in the ends is the most basic way to finish a crochet project. Of all the crocheting tips and tricks, this is the most important thing to learn for your project to appear tidy and complete. We also called this technique “hiding the ends” or “hiding the tails.”
What do you need to weave in the ends?
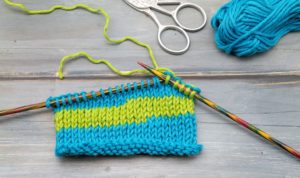
You’ll need a darning needle and scissors to weave in the ends of your crochet work.
A darning needle, also known as a yarn needle or tapestry needle, is a large needle with a blunt point (to avoid splitting the yarn) and a large eye to feed the yarn through.
Despite being historically constructed of metal, yarn needles are most commonly manufactured of plastic, which are affordable and come in a variety of colours. They’re usually bent tip needles, which make working on heavier crochet items more pleasant.
To cover the yarn ends, you may also use a crochet hook instead of needles; it’s all a question of personal choice. You can weave in the ends using a crochet hook when you don’t have a darning needle on hand.
Some designers also employ a transparent flexible fabric adhesive to seal the weaved-in yarn’s tiny ends, so they don’t escape with time and use. This is especially beneficial with smooth, slick yarns that attempt to slip out at every opportunity.
How to weave in the yarn ends in crochet with a needle
Here’s how to weave in a corner end.
- Depending on your crochet design, you may hide the ends in various ways. When crocheting a cornered product, such as a blanket, scarf, or shawl, you’ll notice that each corner has a single long tail yarn end remaining.
- Cut yarn leaving a 6-inch tail or enough yarn to do multiple backs and forth passes with a needle if you have just finished the craft and still have the yarn.
- To use a needle to weave at the end of yarn on the corner of a crochet creation, make sure all the ends are attached and secure first.
- Thread the yarn end through the needle’s eye next.
- Sew the yarn between the stitches, following along the existing threads to keep your weaving as inconspicuous as possible through the last loop of your work and the product’s fabric.
- Go back and forth with your yarn, and if feasible, up and down, to hide it in the work and secure it for future usage of your crochet product.
- To achieve this invisible finish, use the scissors to snip off the remaining end of the yarn as near to the cloth as possible as you feel that enough of the yarn length has been weaved in.
Here’s how you weave in the ends of a project’s edge.
Ends on the project’s edge are frequently in pairs since the yarn was linked due to a color change or the addition of a new ball of yarn.
Because hiding the ends after changing yarn colors is more complex than hiding the ends after adding a new ball of the same color, we will demonstrate how to hide the yarn ends of two different colors. To avoid an unsightly edge, we’ll try to disguise the yarn inside the same color.
- To begin, tighten the connection that connects the two strands.
- Decide where each end will be hidden after that.
- To ensure that the yarn ends are not visible after concealing, we generally weave them into the side of the project that has the same or similar color.
- We pass the yarn through the first and second stitches closest to the knot or join to make the yarn as unobtrusive as possible.
- We attempt to pass the yarn on the wrong side of the project if it has an obvious wrong and right side.
- Then we take one of the ends, thread it through the yarn needle, and sew it into the side of the item we choose, weaving through the existing stitches in different directions to conceal and secure the yarn
- We snip off the remaining ends after we’re certain that the yarn is secure enough.
- We repeat the process with the opposite end until it is completely hidden. Snip the remaining end off and enjoy the product!
Here’s how you weave in the ends of a project in the middle.
- Weaving the yarn tail on the edge of a craft is comparable to hiding the ends amid a project.
- Decide where each end will be braided in the same way you did in the previous stage.
- Oppositely sew one end with the yarn needle to avoid creating a bulge.
- Work each yarn end back and forth in the region where it will be buried, if possible matching the color of the end to the color of the location.
- Snip off the excess ends once both ends have been braided into their appropriate spots.
Should I weave in ends before blocking?
Blocking will help keep all those small loose ends in place, as well as “set the stitches” you weave the ends into, so they don’t seem as rough as you expect.
How do you weave in ends without a needle?
Can you weave without a loom?
What’s great is that you don’t need to buy a loom or have a lot of fancy supplies – all you really need is a piece of cardboard and some yarn to start weaving.
How do you change the color of yarn without weaving in ends?
Does the magic knot ever come undone?
Essentially what you are doing is felting the two ends of the yarn together to form an even join. Here’s a very helpful video on how to Spit-Splice. Magic Knot: It truly is a magical knot that won’t come undone!