A Beginner’s Guide to Embroidery
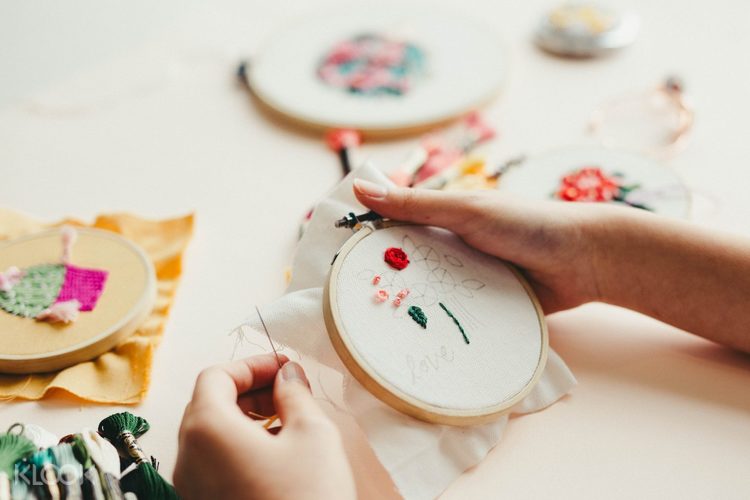
If you are a newbie into the world of stitching and wish to explore more about the variants, nuances of it, then embroidery is a technique you must get your hands on. An embroidery is a craft form of decorating pieces of fabric using needles and yarn in its most lucid definition. This how to embroider technique will enable you to decorate any fabric and make it more embellish and captivating in aesthetics and creativity.
During these tough times, while everyone was practicing quarantine, we all were bored and had ample time in our hands, this is one of the hobbies you can pick up on. After all, creating a piece of art using our own hands gives us a feeling of absolute bliss.
So, if you are a beginner in stitching or want to learn more about embroidery, let’s get into how to embroider, your Ultimate Guide to Embroidery.
Tools You Need For Embroidery
- An Embroidery Hoop (Preferably 6 inches)
- Linen or Cotton Fabric
- Tapestry Needle
- Two pair of scissors (One big and one small)
- Thread
- Disappearing ink pen
Your Guide To Do Embroidery
- Take your hoop and separate the outer and inner lines of the hoop by loosening the hoop on the outer side.
- Now, take your fabric and place it above the inner circle on a flat surface.
- Then place the outer circle on top of the fabric, with the fabric being sandwiched between two circles.
- Tighten the screw until it’s professionally taunting. Insert the thread into the needle and you are all ready to start with embroidery.
SOME BASIC EMBROIDERY STITCHES
Here are some of the basic stitches which form the ABC of Embroidery:
1. Running Stitch
- Insert the thread into the needle, tie a knot to the loose end of the thread.
- Now, position the needle underneath the hoop, and pierce through the fabric tied to the hoop.
- In the next step, insert the needle again. Specifically, towards the fabric — this is your first running stitch.
Continue doing this till the number of stitches desired. The motion of the needle should be Down-Up-Down-Up.
2. Back Stitch
- Position the needle inserted with the thread on the backside of the hoop.
- Take the needle upwards through a point marked on the fabric and insert it downwards, as done in running stitch. Let these points be A and B respectively.
- Now that needle the needle is inserted through B downwards, pierce it upward through another point C.
- Once the thread is facing you through point C, pierce it downwards through Point B. This way, we create a stitch by taking it backward.
This is a backstitch. Repeat doing this for as many stitches desired.
3. Chain Stitch
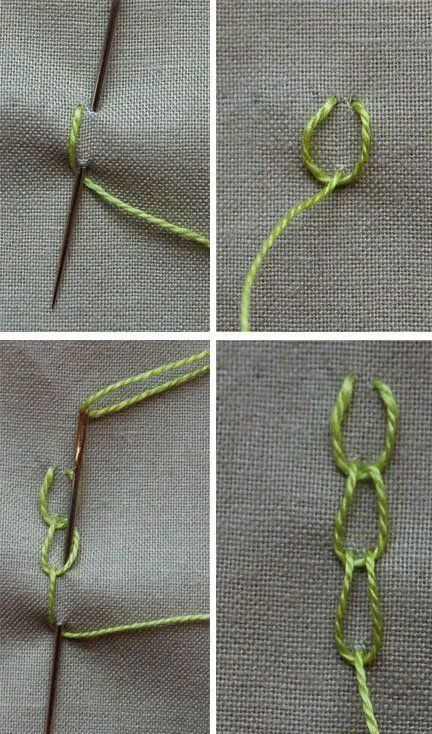
- Get the thread through one point, say point A in the Fabric. Now insert the needle through point A and make its way through point B, but not to pull the needle out completely.
- Take the thread now, from left to right in such a manner that the thread is around the needle, leading to the formation of a loop.
- Next, pull the needle out through point B. The first part of the chain stitch is done.
- Thereafter, insert the needle through point B (inside the hoop) and take it out through point C (outside the hoop).
Repeat these steps till you get the required number of chain stitches.
4. Satin Stitch
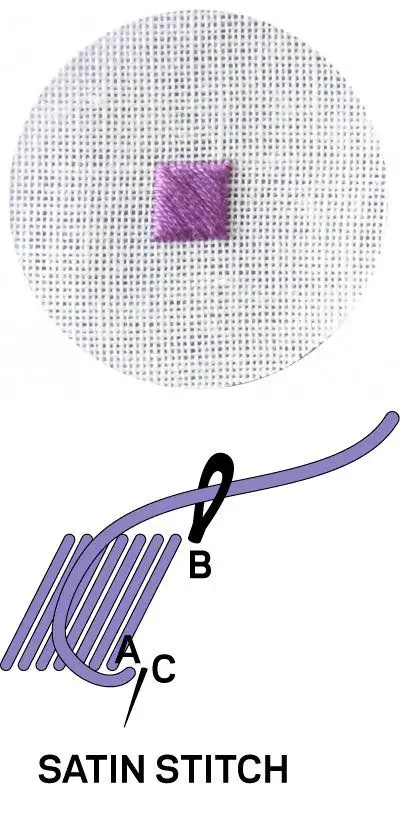
- Mark the design on the fabric using chalk or a disappearing fabric ink.
- Now, insert the thread from underneath the fabric towards the upward direction. Let this be point A
- In the next step, insert the fabric downwards exactly through a point, say B in the opposite direction.
- Next again pierce the thread from down to up in a point extremely adjacent to Point A. This is Point C.
- From Point C again the thread is pierced through a point, say D in the opposite direction, lying very close to Point B.
These steps are continued till the stitches completely cover the design on the fabric. And there you have your satin stitch!
5. French Knot
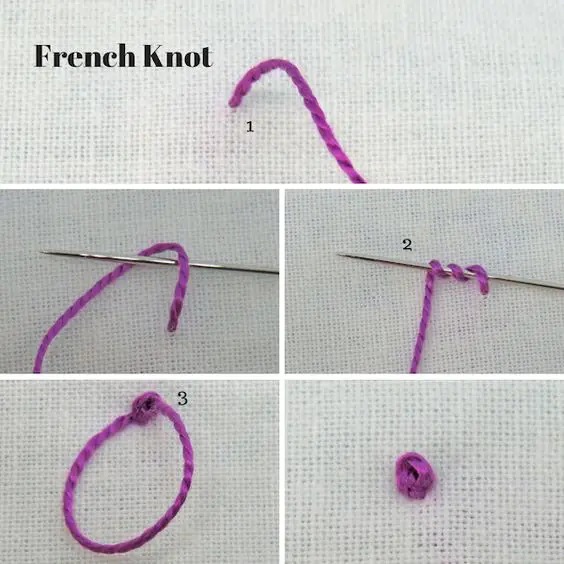
- Take the fabric and pierce the needle out through a point, say A.
- Now, place the needle close to the fabric and wrap the thread around it for a couple of times.
- Next, while pulling the longer end of the thread, insert the needle through a point just near to A.
Lastly, pull the needle downwards, through the fabric. The French Knot is ready!
6. Lazy Daisy Stitch
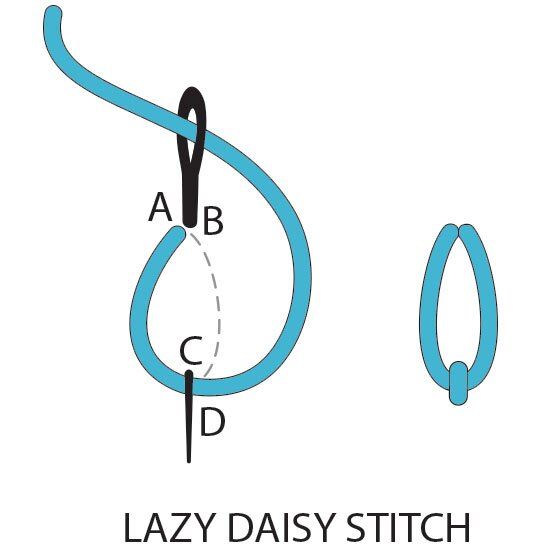
- First, draw the pattern on the fabric using chalk or a disappearing ink pen. This stitch is ideal for floral motifs.
- Pull the thread out of a point, say A. Now insert the needle through a point near and make way for the needle to come out at another point, say B. Make sure to not pull it out completely through B.
- Now, loop the thread around the needle like a chain stitch.
- Thereafter, pull out the needle for the loop to tighten.
Next, put in the needle just outside the chain that has been created. This completes the creation of Lazy Daisy Stitch. Continue repeating the steps to create as many lazy daisy stitches you desire.
REQUISITE TIPS TO KEEP IN MIND
Embroidery is an art— to master any art-form, requires patience, practice, and diligence. To ensure a blissful endeavor in your first attempt to embroidery, the following steps should be kept in mind:
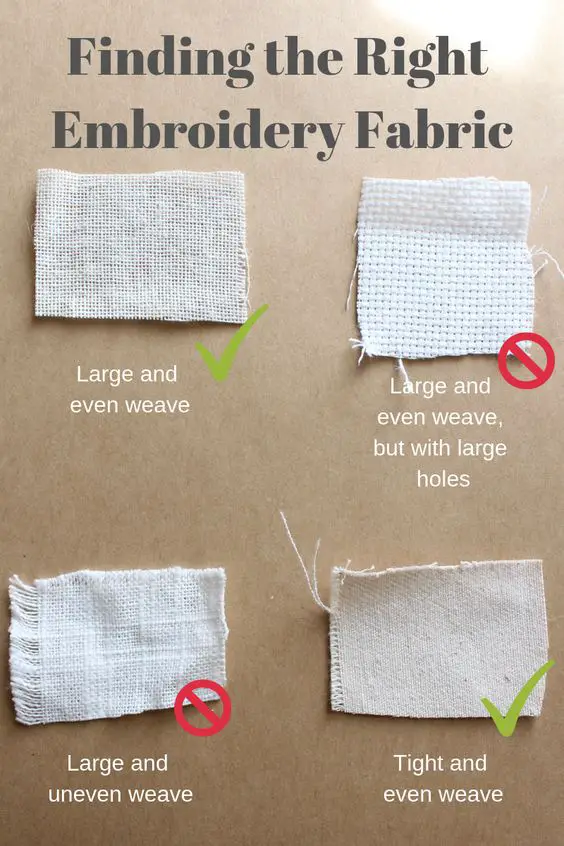
- If you are a beginner or an amateur, use embroidery fabric to practice. The special fabric comes with premade lines, which makes the entire process very easy.
- Use the right kind of needle and thread.
- After practicing your skills on embroidery fabric, switch to a light fabric which is easy to work with.
- Lastly, keep on practicing to gain mastery over this beautiful art form.
How easy were these steps, isn’t it? Well, then what are you waiting for? Start practicing these beautiful stitches and beautify your home, apparels and décor. Mastery over this art-form will not just give you praises and validation but also joy and contentment, which is unparalleled.
