Yoga For Back Fat (Work On That Back Line Muscle)
Jump To:
Getting rid of back fat is one of the hardest fitness targets to achieve. Working hard with this yoga poses for back fat can help along with overall weight reduction. There’s no miracle solution to reduce fat on the back, work on that back line muscle. You will first need to reduce your overall body fat percentage through cardio exercises. Once you begin to diminish your body fat percentage, you can target the muscles in your back to strengthen and tone them. Performing this yoga for back fat poses regularly will help you get slim and toned back muscles.

3 Yoga Poses for Back Muscles
Here are three basic yoga for back fat poses that specifically target your back.
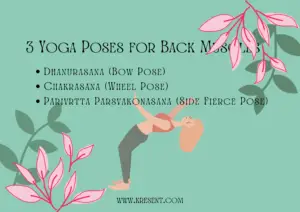
1. Dhanurasana (Bow Pose):
This pose effectively reduces back fat and alleviates joint pain.
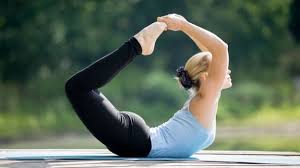
Dhanurasana Steps:
- Lie flat on your abdomen, and press your belly button into the floor. Bend your knees and grab the outside edge of first your right ankle, and then your left ankle.
- Once you have held each ankle firmly, keep your toes together. Inhale deeply while lifting your feet and thighs as high up as you can. Bring your weight forward so that you are resting on your belly instead of your pubic bone.
- Hold this pose for five deep breaths.
2. Parivrtta Parsvakonasana (Side Fierce Pose):
This pose works out your glutes, quads, and upper back.
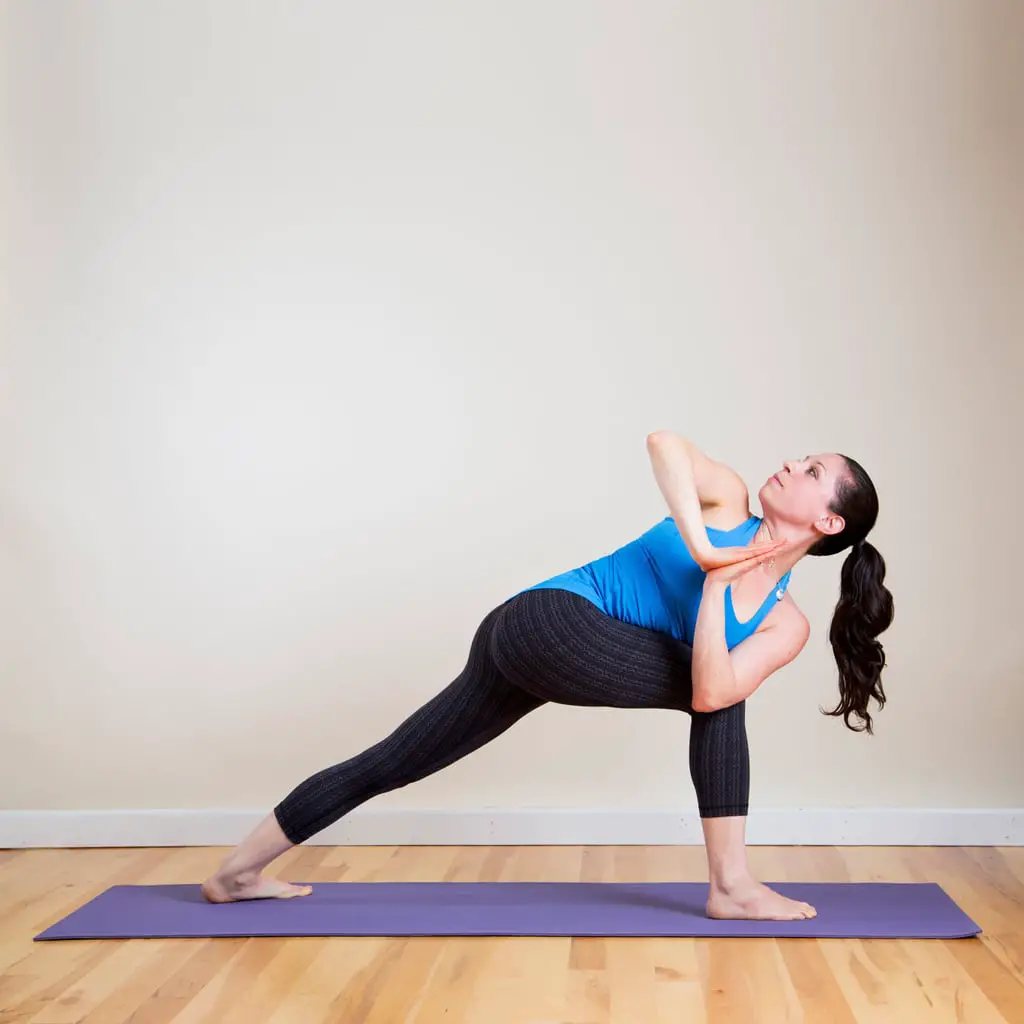
Parivrtta Parsvakonasana Steps:
- Stand with your feet together.
- Inhale deeply while bending your knees and lowering your hips as you raise your arms above your head.
- Exhale and cross your right elbow over to your outer left knee. Bring your palms together as you push your lower elbow against your thigh to lift and rotate your chest up, enhancing the twist. Pull your right hip back a little, making sure your knees are parallel to each other.
- Hold the pose for five deep breaths, then inhale as you press into your feet and lift your torso, coming back to the starting position. Exhale to cross your left elbow over your right outer knee, and hold for another five breaths on this side.
3. Chakrasana (Wheel Pose):
This pose reduces fat accumulated in the back. It mainly targets your upper body, abdomen, and back.
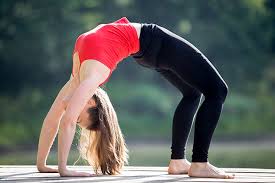
Chakrasana Steps:
- Lie on your back, bend your knees, and place your feet flat on the floor.
- Bend your elbows and place your palms flat on the floor above your shoulders, with your fingertips facing your feet.
- Inhale; press into your palms, and lift your head, shoulders, and hips off the ground.
- Hold the pose for five deep breaths.
4. Trikonasana (Triangle Pose):
The Trikonasana, or triangle pose, stimulates the function of the entire body and gives a lateral (side) stretch to the spine. It helps reduce blood pressure, stress, and anxiety.
Practice this asana every day and you’ll gain strength in the ankles, thighs, knees, hips, calves, and hamstrings. All standing poses build the cardiovascular system, so the more you do it, the better your stamina.
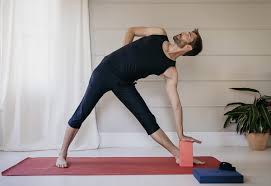
Trikonasana Steps:
- Stand with your feet three to four feet apart, arms by your side. (If you’ve never done it before, use the wall for support.)
- Open the right foot to 90 degrees and turn the left foot slightly in, towards the right.
- Inhale; raise both your arms out to the side, palms facing down.
- Exhale; extend the torso towards the right, bending from the hip joint, not the waist.
- Start the movement by strengthening the left leg and grounding the heel firmly to the floor. If you’re new to this, feel free to bend the knee ever so slightly. Rotate the torso to the right, keep both the sides equally long and ground the right leg.
- Rest the right hand on your shin, ankle, or the floor outside the right foot. Using a yoga block to place the hand helps here. Stretch the left arm towards the ceiling, making sure that both the shoulders are in line. Keep your head in line with the spine gazing towards the right big toe.
- As you get used to this, aim to look at the ceiling. Hold this position, and breathe deeply for five breaths or for 30 seconds.
- Inhale to lift up, pressing right foot firmly on the floor. Repeat the same on the left side. You can do this on both sides, three or four times.
The aim is never to overdo it but to engage regularly so that you get stronger and more stable over time.
Does Bhujangasana reduce back fat?
Apart from helping reduce belly fat, the cobra pose also cures digestive ailments like constipation. This asana is particularly great for individuals suffering from back pain and respiratory disorders.
Can yoga reduce back fat?
How do I get rid of my back fat?
To get rid of fat deposits on your back, you’ll need to start by creating a caloric deficit. That means that you’ll need to burn more calories than you consume. In addition to cutting calories, you can tone your back muscles if you focus your exercise routine to target the muscles in your upper and lower back.
Does yoga tone back?
Back – not only do yoga poses tone the muscles in your back to make them stronger and firmer, poses such as downward-facing dog and child’s pose also gently stretch out your back to increase flexibility, reduce tension, and relieve tightness.
Will daily yoga changed my body?
“Yoga has the potential to increase fat loss, develop muscle tone, and build flexibility, leading to a more lean-looking physique,” he says. If flexibility and balance are what you’re after, even the gentlest forms of yoga will do the trick. Many types also help you build muscle strength and endurance.
Will daily yoga tone my body?
The connective tissue and muscle fibers get longer and the added resistance creates tension that helps the body build and maintain a toned appearance. For these reasons, yoga is an excellent way to tone virtually every major muscle group including the booty and abs.
How long does it take to see results from yoga?
about 6-12 weeks When done consistently and under the guidance of a proper yoga instructor, yoga usually takes about 6-12 weeks to see results, although this varies from person to person. Yoga must be practiced in its entirety for the best benefits.
