Foods that help different health problems – Foods that cause gas
 Eye exercises for tired eyes
Outfit Ideas For Different Occasions
Vaseline Uses For Skin, Hair, Pets And More
All About AIP Diet
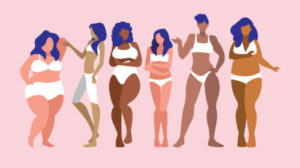 How To Dress For Your Body Shape
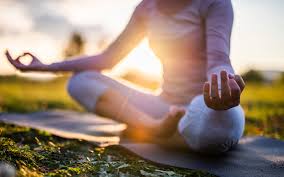
Yoga For Different People
Yoga For Different Parts Of The Body
- Yoga for joints
- Yoga for abs
- Yoga for eyes
- Yoga for shoulders
- Yoga for spinal cord
- Yoga for arms and forearms
- Laugh line exercises
- Flat feet exercises
- Ashwa sanchalanasana (Yoga for legs and lower body)
- Yoga for Manipura chakra (Solar plexus yoga)
- Ujjayi pranayama/Ocean breathing
Yoga For Various Problems


 …
…
- Yoga for carpal tunnel
- Yoga for belly fat loss
- Yoga for mood swings
- Yoga for upper back pain
- Yoga for neck pain relief
- Yoga for PCOS
- Yoga for skin problems
- Yoga for depression
- Yoga for fatigue
- Yoga for back fat
- Yoga for hip pain
- Yoga for sciatica
- Yoga for insomnia
- Yoga for migraine
- Yoga for period pain
- Yoga for ankle pain
- Yoga for thyroid
- Yoga for stiff back
Yoga For Various Purposes
- Yoga to strengthen back
- Yoga for balance
- Yoga Nidra
- Pranayama for stress relief
- Yoga for immune system
- Yoga for stress relief
- Yoga for digestion
- Mudra for water retention
Tips And Benefits Of Yoga


- Yoga for concentration and focus
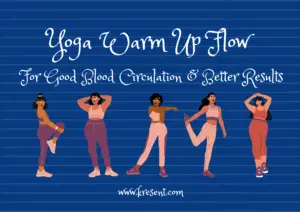
- Yoga warm-up flow
- Common yoga mistakes
- Tips to do yoga asanas correctly
- Importance of stretching
- How to do surya namaskar
- Bija mantra – Benefits of chanting
- How to improve concentration
- Summer yoga to beat the heat


Is oversized clothing a trend?


while fashion is still very inclusive in terms of what to wear in 2021 – some trends do stick out more than others and somehow make more of a statement, and even hang around more than others. THIS is the case with OVERSIZED trend. Big clothes are everywhere.
- Oversized t shirt cutting ideas
- How to style oversized denim shirt
- How to wear oversized shirts
- How to wear oversized plaid blazer
- Turn oversized shirt into dress without sewing
- Make oversized t shirt cute without cutting
- Oversized hoodie outfit ideas
- Oversized zip up hoodie outfit ideas
- Oversized cardigan outfit ideas
- Oversized sweatshirt outfit ideas
- Oversized blazer outfit ideas
- Oversized denim jacket outfit ideas
- Oversized leather jacket outfit ideas
- How to wear oversized polo t-shirt
- How To Wear Oversized Hockey Jersey
- How To Wear Oversized Sweaters And Not Look Fat
- How To Wear Oversized Sweater With Shorts
- How To Wear Oversized T-Shirts Guys
- How To Wear Oversized Shirts With Jeans
Crochet


The beginner’s guide to crochet
- Beginner Crochet Stitches
- What does SP mean in Crochet
- What does STS mean in knitting
- What Does HDC Mean in Crochet
- What does tog mean in crochet
- What is Frogging in Crochet
- How to crochet faster
- Sewing Vs Knitting Vs Crocheting
- How to wash a skein of yarn
- Fix fuzzy yarn
- Make yarn stiff
- Moebius knitting
- Types of yarn
- Acrylic yarn melting point
- Toddler scarf length
- Knitting essentials for beginners
- What crochet stitch uses least yarn
- How many yards is 50 grams of yarn
- How many skeins of yarn to crochet a blanket
- Wiccan crochet pattern ideas
- How long does it take to crochet a scarf
- How long does it take to crochet a blanket
- How long does it take to crochet a hat
- What does SP mean in Crochet
- What does STS mean in knitting
- What does tog mean in crochet
- Yarn for crochet rugs
- Fix uneven crochet blanket
- Crochet blanket edges curling
- Knitting in round
- Double knit yarn
- Knit Vs Purl
Skin Problems And Exercises
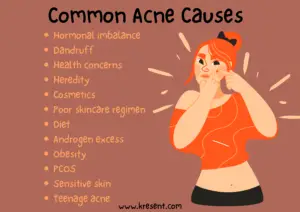
- All About Acne (Acne Causes, Types, Prevention Tips)
- Acne Face Map – Identify The Problem Source
- Laugh Lines Exercises – Best Facial Yoga
- Yoga For Skin Problems – Yoga Routine For Glowing Skin
- Kapalbhati Pranayama(Detoxify Internal Organs & Let Skin Glow)
Ingredients That Benefit Your Skin
- Aloe Vera Benefits For Skin
- Benefits Of Coconut Water For Skin, Hair, And Health
- Carrot Juice Benefits For Eyes, Skin, Immunity And More
- Benefits Of Neem (For Skin, Hair, And Overall Health)
- Marula Oil Benefits For Healthy And Radiant Skin
- Sunflower Seed Oil Benefits For Skin And Ways To Use
- Biotin Rich Foods For Lustrous Hair, Healthy Skin And More
- Oolong Tea Benefits For Weight Loss, Skin Health And More
- Apple Cider Vinegar Benefits For Skin
Skin Care Routine
- Anti Pollution Skincare Routine
- How to Get Glowing Skin
- Skin Care Routine For Winter
- Monsoon Skin Care (Working Tips And Home Remedies)
Skincare Tips And DIYs For Skin
- 7 Amazing Rice Packs For Glowing Skin & Gorgeous Hair
- How To Moisturize Skin Naturally At Home And Essential Tips
- Open Pores Home Remedies With Skincare Routine Tips
- DIY Aloe Vera Face Packs For Different Skin Types & Skin Problems
- Homemade Body Scrub For Glowing Skin (3 Easy Recipes)
- Fruit Packs For Dry And Oily Skins
- Bridal Makeup Tips – Loving Your Skin Before The D-Day
- Smoking Effects On Skin And Hair
- Home Remedies For Blemishes (6 Best Kitchen Ingredients For Clear Skin)
Kids Hairstyles
Kids often wish for change in their clothing, food, and of course, hairstyles. Do not worry! We will keep updating them on this tab for you!!
- Toddler Hairstyles
- Kids mohawk hairstyles
- Hairstyles for school
- Stylish Kids Braids
- Boys fade haircuts
- How to cornrow
- Natural hairstyles for kids
- Back to school hairstyles
- Quick and easy hairstyles for school
Hairstyles For Women
A woman can slay it with just loose hair and a middle partition on a casual day. But, she needs to pair the right kind of hairstyle with her outfit to look absolutely gorgeous. Here is a list of hairstyles for women that is never-ending!!
- 90s Hairstyles
- Simple hairdos
- Stylish and easy updos
- Hairstyles for round faces
- Hairstyles for long hair
- Types of perms
- Types of perms for short hair
- Hairstyle For Women Over 50
- Short Natural Hairstyles
- Medium Length Hairstyles
- Scrunchie hairstyles
- Scrunchie Hairstyles For Curly Hair
- Scrunchie Hairstyles For Short Hair
- Scrunchie Hairstyles For Thin Hair
Haircuts
Hairstyles For Men
Although most men choose to have short hair, they need special care and attention to look classy and stunning. We promise you to keep updating this list of hairstyles for men according to their hair type and face shapes. Make sure to keep a tab on this!
Hair Accessories
Different hair accessories are popping up every single day! We will make sure to get you updated with the information about old and new accessories and their uses!
Haircare
Haircare is a must, irrespective of gender. Ensure to keep an eye on this list to get updates on different aspects relating to hair care.
- Haircare tips
- Baby haircare
- Essential Oils For Hair
- How to deep condition hair
- How to moisturize scalp
- DIY conditioner
- LOC Method
- Apple cider vinegar rinse
- Pre Poo
- Hair loss causes
- How to detangle hair
- Rice packs for hair
- Rice water for hair
- Benefits of coconut water for hair
- Benefits of neem for hair
- Biotin rich foods for hair
- Henna for hair
- Aloe vera benefits for hair
- Smoking effects on hair
- Curl pattern types and hair care tips
- How to grow edges fast
Home Remedies
- Home remedies for eyebrow and eyelash growth
- Itchy Scalp And Dandruff Home Remedies
- Best oils for hair growth
- Best foods for hair growth
- Cute outfits for girls
How To Use Essential Oils

We promise that these articles on various topics like essential oils for skin, essential oils for hair, essential oils for men, essential oils for home, essential oils benefits, etc. are worth checking out for various concerns relating to skin, hair, etc.
Essential Oils Benefits
- Benefits Of Essential Oils For Overall Health
- Types Of Essential Oils And Benefits
- How To Use Tea Tree Oil Effectively
Essential Oils For Skin
- Essential Oils for Skin That Cleanse, Renew, Beautify
- Essential Oils Massage Oil Recipe To Get Rid Of Cellulite
- Essential Oils For Skin Tags And Warts
- Essential Oils For Acne With Different Functions
Essential Oils For Hair
- Essential Oils For Oily Hair
- Essential Oils For Gray Hair With A Hair Oil Recipe
- DIY Baby Shampoo With Essential Oils
- Essential Oils For Damaged Hair To Heal And Protect
- Essential Oils For Colored Hair – With Moisturizing Recipes
- Essential Oils For Frizzy Hair – Tame It With This Hair Oil
- Essential Oils For Dry Hair With Suitable Carrier Oils
- Essential Oils For Dandruff With An Effective Shampoo Recipe
- Essential Oils For Thick Hair With Thickening Treatment Recipes
- Essential Oils For Curly Hair– With An Effective Hair Oil Recipe
Essential Oils For Men
Essential Oils For Home

- How To Use Essential Oils to Scent a Room
- How To Use Essential Oils Without A Diffuser
- Best Smelling Essential Oils for Home

Best Carrier Oils
- Jojoba Oil Benefits – Carrier Oil
- Castor Oil Benefits – Carrier Oil
And more coming up…
All About Piercings, Accessories, And Aftercare
How to style workwear with piercing
- Types Of Piercings
- Types Of Nose Rings
- Types Of Earrings
- Attractive Male Piercings
- Types Of Ear Piercings For Guys
- Health Benefits Of Nose Piercing
- How To Heal A Lip Piercing Faster
- How To Clean Nose Piercing
- Guidelines On How To Clean Ear Piercing
Nose Piercings
Ear Piercings
Lip Piercings
Plant Care Guide


How to build Emergency vegetable garden.
- Types of indoor plants
- House plants
- Gardening tools list
- Best indoor plants for clean air
- Best indoor plants for dark rooms
- Bathroom plants
- Low maintenance indoor plants
- Non toxic indoor plants
- Low light house plants
- Fragrant indoor plants
- Rose plant care
- Camellia blooming season
- Iris blooming season
- Dwarf butterfly bush care
- Best flowers for bees
- When do peonies bloom
- Yucca plant care
- Types of tomato plants
- What is the healthiest indoor plants
- Elephant ear plants care
- Plants to keep mosquitoes away
- Are sunflowers perennials or annuals
- Perennials Vs. Annuals
- How big do lilac bushes get
- Are coffee grounds good for hydrangeas
- How to take care of pothos
- Easy flowers to grow
- Summer flowers to plant


Tattoo Ideas


Firstly, the types of tattoos! Then the ideas for tattoos…
- Tattoo ideas for women
- Tattoos ideas for men
- Tattoo cover up ideas
- Small tattoo ideas
- Semicolon tattoo ideas
- Rose tattoo ideas
- Queen Bee tattoo ideas
- Music tattoo ideas
- Minimalist tattoo ideas
- Meaningful tattoo ideas
- Memorial tattoo ideas
- Lion tattoo designs
- Flower tattoo designs
- Finger tattoo ideas
- Family tattoo ideas
- Friends tattoo ideas
- Heart tattoo ideas
- Camera Tattoo Ideas
- Crown Tattoo Designs
- Cherry Blossom Tattoos
- Blue Butterfly Tattoos
- Butterfly tattoo ideas
- Arrow tattoos for men
- Angel tattoo ideas
Tattoo Tips
Don’t forget to learn about Tattoo tips for beginners, Tattoo aftercare, Post tattoo removal care for a better understanding of how to care for your tattoos and skin